
„Every viewpoint products individual perspective distortion!”
Key-words: edges’ virtual meeting point, quarter-ladder, framing cubic grid, guide ray, Master Picture Plane, picture plane mosaic, proportion’s numeric expression, sight from above, sight from below, target area of observation, total inward height.
Ingredients: flexible yet rigid, colored band or wire, suitable for instant marking (e.g. short pieces of insulated electric wire)

Goals
Teaching Architectural Freehand Drawing generally begins with observation based depicting of rectangular bodies made of regular skeleton structures. It would be highly desirable to effectively liquidate one of the most common typical mistakes: the excessive sight from above.
The subject’s topic starts with the analysis of the framing cubic grid. Virtual meeting points (mutual coverings between bars) of the regular skeleton secure become distinct on our Master Picture Plane; their position can be expressed through clear proportion numbers. The bars in some places necessarily cover each other. Belonging to every viewpoint a personal perspective distortion, these virtual meeting point situations are typically individual.

The Method
Our goal is raising awareness; our method consists of emphasizing the target area of observation. Operating with everyday accessories (as pieces of insulated wire happen to be anywhere), my method focuses the student’s attention to the target field of observation. By directing the observer’s attention to one of the most visible phenomena in rectangular skeleton bodies’ perspective depicting, the procedure practically enlarges certain details of the view.
Perspective means the science of semblance. Before correcting manually the student’s paper (in plane), let’s fix temporarily by him or her right in the skeleton cube object (in space) the exact position of certain vital overlapping as exclusively seen from his or her viewpoint! For this purpose, namely instantaneously catching virtual meeting points between skeleton bars, a quick loop (slipknot) of colored wire seems to be appropriate.
By changing our viewpoint, the virtual meeting between skeleton cube’s edges is apparently moving. If bending closer, for example, the rear edge of the bottom square seems to climb on the nearest scale. That’s the source of the name: Gliding Point.
The chronological order of the practice:
1) First sketching based on free observation.
2) Let’s transmit some virtual meeting points between skeleton bars right to the object!
3) Looking out from our original drawing place let’s control again the gliding point’s exactitude!
4) If necessary we adjust the loop’s position – or moreover, the drawing! The error’s sign might be recognized by partially moving body.
Proposed applications
A) At cube drawing let’s indicate the virtual meeting point (M) between closest vertical edge (baptized S like scale) and bottom square’s rare edge (abbreviated in Hungarian for the sake of a play on letters: EHÉ) by using a colored, elastic yet rigid band or wire! The formula read backwards hides the family name of the author: MÉHES.
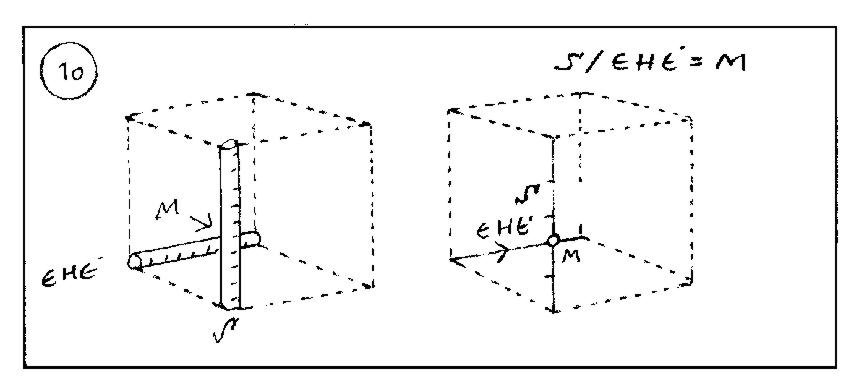
The traditional preparation of the basic skeleton cube as an object consists of some chalk sign subdivisions (half plus quarter points) applied to the closest vertical edge. During the practice, above all, along this subdivided edge will be moving the loop of our gliding point.
B) The position of the Fourth (backside) Vertical Edge related to the upper edge of the front plane can be similarly determined. By consistently applying these steps, we soon reach the exact shape of the Total Inward Height. The total inward height (put together of lower, central and upper picture plane mosaics) plays a decisive role during the skeleton cube’s structural sketching.
C) In case of sight from below let’s fix the virtual meeting point between skeleton bars belonging exclusively to the observer’s viewpoint in a similar way!
Even at the most common parallel case (One Vanishing Point Perspective) might the gliding point exercise put into action. Eventually here we make an advance of Horizontal Projection by over bridging the gap between bars with the longer branch of the loop.
The branches of the loop ought to be bent into suitable position which corresponds to observer’s viewpoint (that’s parallel to the Picture Plane and perpendicular to the guide ray).
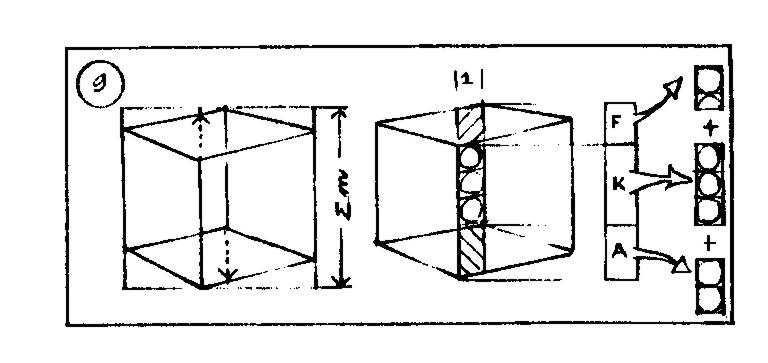
D) While drawing cylindrical rings we observe quarter-ladders’ virtual meeting points (which are spokes’ plane edentate quadratic rows at right angles to each other) in order to better depict the framing cubic grid’s perspective distortion appropriate to our viewpoint. Being this the most difficult first year task, I do hope that here this outlined method will seriously help us!
Hoped pedagogical results
I suspect that my procedure’s pedagogical significance lays in the possibility of spectacular demonstration of viewpoints’ difference. True out from here is surely false out from there – I’m seeing it like this, you’re seeing it differently… Simultaneously made drawings can not be the same! We may even add name tags to the different knots belonging to dissimilar gliding points representing singular viewpoints (according to different directions and horizon levels).
Bands with different colors suspect similar conclusion.
If our student insists to his or her error (seeing it not, seeing it in another way), let’s pass backward: let’s find the very place where from bar intersections would develop like the mistake! Maybe it is not the drawing which is bad but just the place is false…
In my opinion the Gliding Point exercise helps to develop even the sense of proportion. The fraction’s value to be determined (namely the relation between certain sections) expressed in numbers of the proportion we are looking for, certainly facilitates to transmit the spatial connection to paper’s plane.
That is how 3 D shall be transformed into 2 D.
I think that my procedure - if added the patience of a teacher unremittingly correcting by hand those typical mistakes complained in the preface - is a view-shaping one. Highlighting critical details of the common set, the Gliding Point Method certainly will increase the effectiveness of our teaching which should be modernized. If the direction is good, even a single stage movement shall affect the whole auditorium. Although the neighbor sees it guaranteed differently (that’s the point!), to let recognize this difference is the hoped pedagogical yield of my new method.
Summary
The virtual meeting of skeleton body’s edges can be objectively controlled by using the gliding point.
Nincsenek megjegyzések:
Megjegyzés küldése